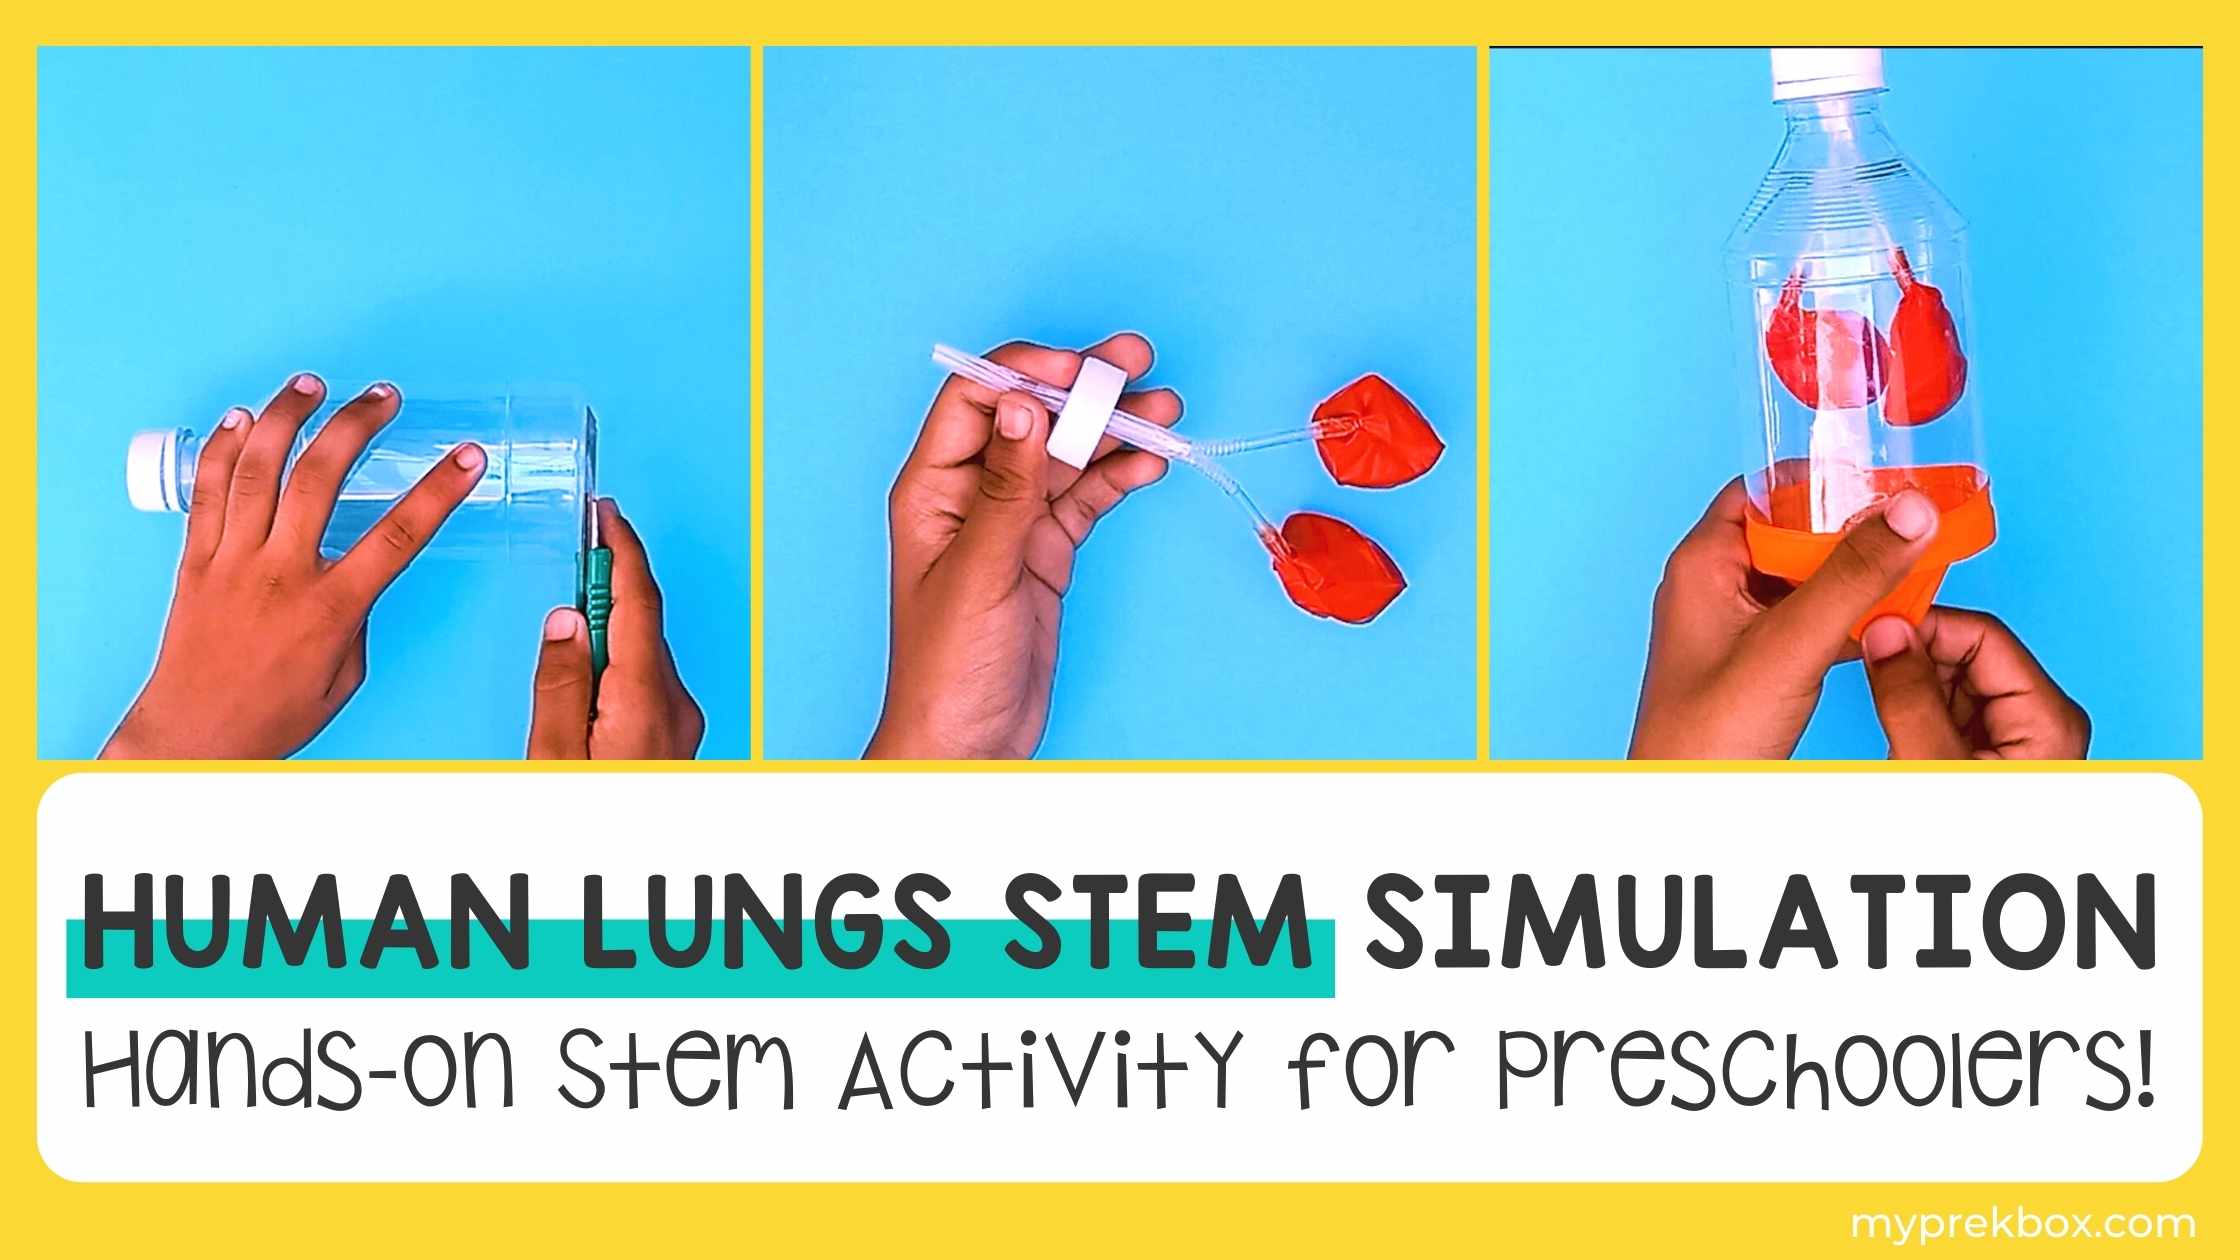
Has your preschooler asked you before how people are able to breathe? How could you answer that (in the simplest way a preschooler would understand)? Of course, we can explain that scientifically, but the process and terminologies would be too complicated for little kids! It would help if we could SHOW them - and a fun and educational way to do that is through STEM crafts! So, we will be making a Human Lungs STEM Simulation today to help parents explain how our lungs work and help us breathe.
My Pre-K Box: The ultimate subscription box for preschoolers!
My Pre-K Box takes all the searching, prepping, and stress out of planning preschool activities for your 3-5-year-olds. Each month, we focus on a different set of Kindergarten readiness skills and provide all the materials and instructions you need right in the box. You'll never have to worry about what activity to do next or spend hours looking for ideas online again!
Using crafts to help little kids understand STEM concepts is great and very exciting for them because they get to see how things work in a simple way. Just like in this Human Lungs STEM Simulation, they’d get to see a model of the lungs and learn how it actually works the same way our body does! It helps develop their thinking and fine motor skills as they help out in making the craft. Moreover, their language and communication skills are also enhanced because they’ll keep asking questions! So be ready to answer them too! If you’re ready, let’s start by making the human lungs model first.
Materials for the Human Lungs STEM Simulation:
|
 |
 |
Want more science learning for your little one? We have the right freebie for you! Get this Science Preschool Fun Pack today to help you introduce basic science concepts to your preschooler! It includes 10 free science worksheets that cover different science topics like the weather, seasons, plants, animals, and so much more! Read more about the Science Preschool Fun Pack in this blog post, and get your FREE copy now!
|
Let’s make the Human Lungs model in 6 easy steps!
Step 1 Get the empty plastic bottle and cutter. Cut the bottom part of the bottle, then punch a hole in the bottle cap. It should be big enough for a straw to pass through. You can use scissors for this.
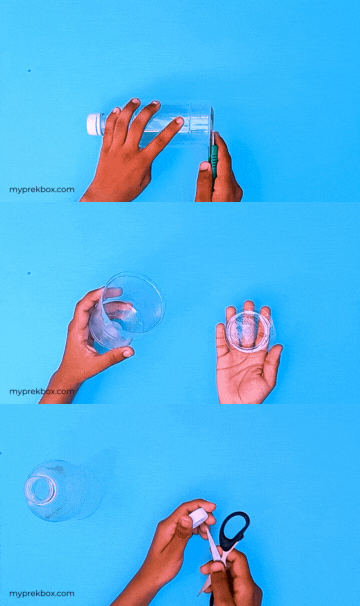
Step 2 Cut the upper end of 2 flexible drinking straws, about 2 inches from the part where it bends. Then cut the regular drinking straw about 4 inches or depending on the size of your bottle. Insert one end of the two flexible straws inside the regular one to form a Y shape.
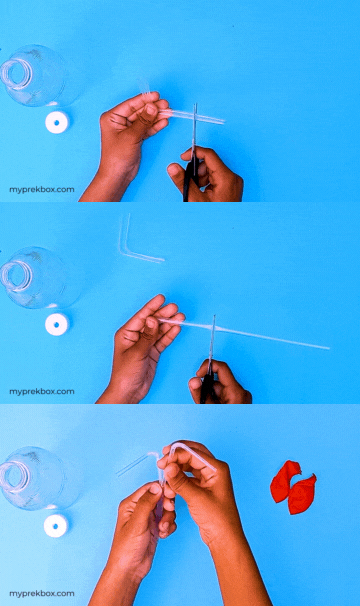
Step 3 Cut the ends of the balloons, then attach them to the two ends of the Y-shaped straws. Use tape to secure them in place.
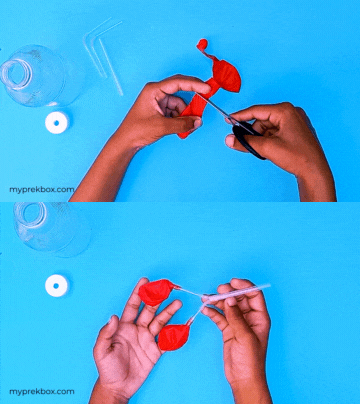
Step 4 Next, insert the other end (the bottom of the Y-shaped straw) into the hole you made on the bottle cap.
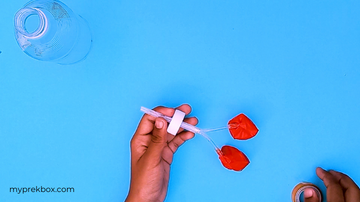
Step 5 Place it inside the plastic bottle. To keep it in place, you can add some tape to the bottle cap and straw (optional). This also helps to prevent air from coming in through the hole in the bottle cap, as air should only come from the straw.
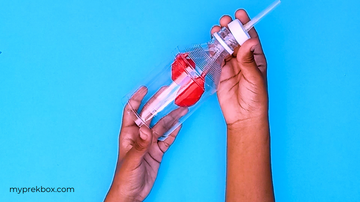
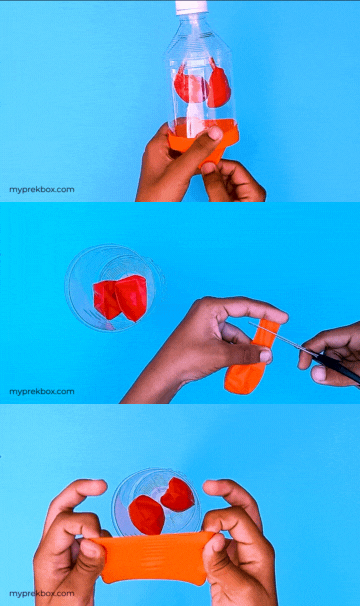
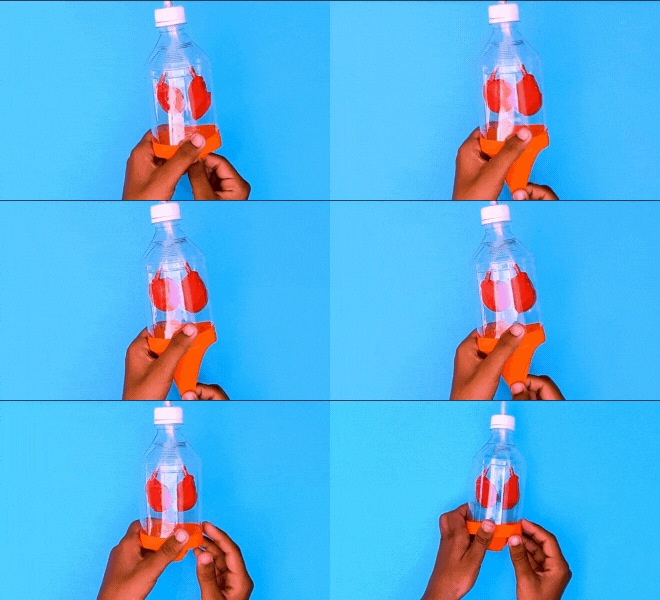
Step 6 Get another balloon, cut its end, and stretch it to fit the bottom of the bottle. You can also add tape to secure it in place. Now, pull the balloon. See what happens? As you pull the balloon at the bottom, the two balloons inside inflate. Then it deflates when you let it go! Amazing, right?!
|
Before you go… Here is another science-freebie! Get this Rocket Launch Experiment for another fun STEM learning with your little one! Learn how a rocket is launched in this exciting experiment. It includes complete instructions and processing questions to help you and your child understand the process. Learn more about the Rocket Launch Experiment here, and be sure to download it now for another fun day filled with science learning!
|
 |
The science behind the human lungs model - how does it work?
The human lungs model that we created is comprised of 3 balloons. The two balloons attached to the straw represent our lungs, while the third one at the bottom is our diaphragm. As we inhale, our diaphragm moves down and draws air into our lungs. Thus, we pull the balloon at the bottom causing the two balloons inside to inflate. When we exhale, the diaphragm moves back up and the air is pushed back out of our lungs. So when we let go of the balloon at the bottom, the two balloons inside deflate. This is how we are able to breathe!
We hope you learned a lot and enjoyed this Human Lungs STEM Simulation activity!
For more STEM activities, check out these blog posts too!
- Robotic Hand STEM Simulation
- Robot Stacking — An Easy STEM Activity for Preschoolers
- Solar Oven S'Mores: A Fun Preschool STEM Experiment
If you find yourself spending more time looking at cute activities like this and finding supplies for them rather than actually doing the activities with your preschooler, we have the perfect solution for your problem! We developed My Pre-K Box - a no-prep learning kit for a busy parent like you! With our educational subscription box, we mail your preschooler EVERY MONTH with a learning kit that features a fresh new theme! Their package is packed full of fun, hands-on, play-based learning that preschoolers LOVE to do! You'll love how fun and easy it is!
My Pre-K Box takes all the searching, prepping, and stress out of planning preschool activities for your 3-5-year-olds. Each month, we focus on a different set of Kindergarten readiness skills and provide all the materials and instructions you need right in the box. You'll never have to worry about what activity to do next or spend hours looking for ideas online again!
Let's Connect
If you love this Human Lungs STEM Simulation, LIKE and FOLLOW our Facebook and Instagram pages to get more DIY activities, art projects, fun crafts, and free printables! Be sure to tag us on photos of your kids doing this fun and educational activity. Use the hashtag #myprekbox or send those amazing photos on our social media pages!
Want to Try My Pre-K Box?
 |
My Pre-K Box is the best subscription box for kids 3-5 years of age!
Everything you need to play, create, explore, learn, laugh, and enjoy!
|
